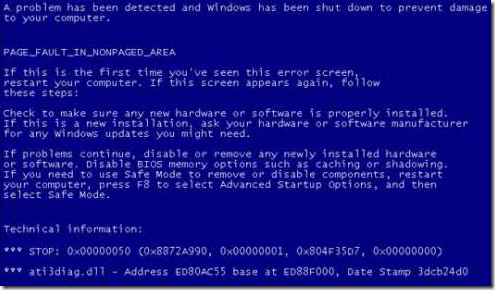
At first, I thought this was something to do with the application we just installed, so I decided to restart the computer in Safe Mode and uninstall the app. It seemed to have worked because the BSOD went away, but only for a short time.
STOP: 0x00000050 (0xCD3DD628, 0x00000001, 0x804EFC9A, 0x00000000) After a few more restarts, the message came back again! After doing some research, I found out that this error message basically means that Windows is trying to find a piece of data in memory and it cannot be found. According to Microsoft, this error can be caused by faulty hardware (RAM, hard drive), anti-virus software, a corrupted NTFS volume or bad drivers. In this article, I’ll walk you through the different solutions, some of which are easier than others. Note that bad memory (RAM) is the main reason this error occurs, but I don’t mention it till much further down only because it could require opening your computer and adding/removing RAM chips. I figure most people would love to avoid that, so I’ve listed the easier solutions first in case one of those happens to work.
Method 1 – Adjust Paging File
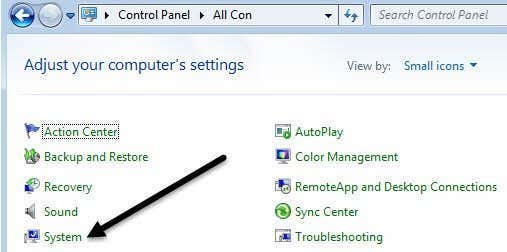
To start off, you can try a simple trick with the paging file that fixes the issue for some folks. If the issue is not hardware related, then this page file solution might just work. First, open the Control Panel and click on System. You can also right-click on Computer or This PC and choose Properties.
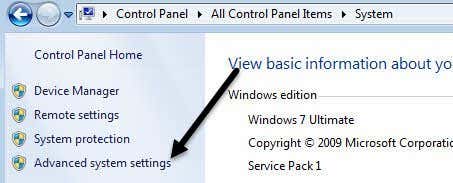
Now click on the Advanced System Settings link on the left hand side.
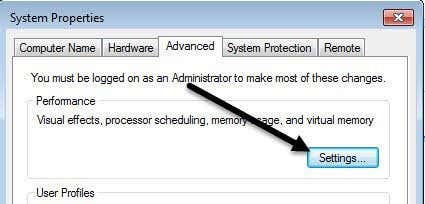
Under Performance, click on the Settings button.
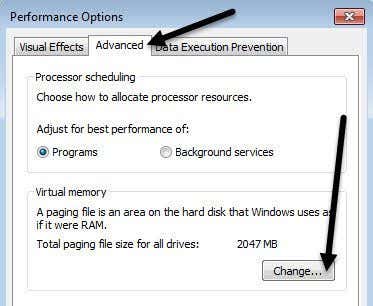
Click on the Advanced tab and then click on the Change button under the Virtual Memory heading.
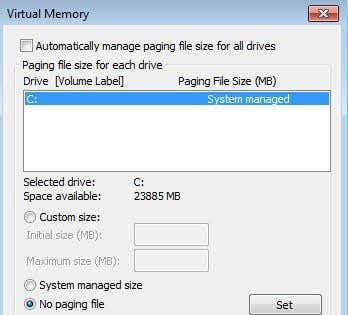
Finally, we have reached where we need to be. Uncheck the Automatically manage paging file size for all drives box and then select No paging file.
Click OK several times to get out of all the dialog windows and then restart your computer. Once you are back in, follow the exact steps again shown above, but this time select System managed size and check the Automatically manage paging file size for all drives box. Like I said earlier, this works for some people, but not others so your mileage will vary. If you’re still getting blue screens, keep reading.
Method 2- Check Disk
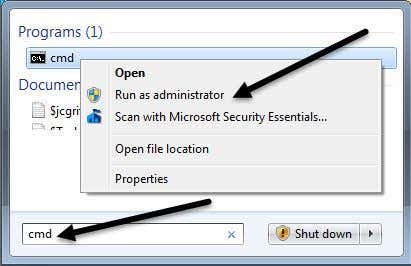
This error can also occur if your hard drive is either failing or has errors on the drive. One quick way to check the hard drive is to run the chkdsk command in Windows. To do this, click on Start and type in cmd. Right-click on the top result and choose Run as Administrator.
At the prompt, type in the following command: If you get a message stating the drive is locked and if you would like to schedule a chkdsk on the next restart, type in Y for yes. Go ahead and restart your computer and allow chkdsk to run, which could take a long time on Windows 7 and earlier. The process is much faster on Windows 8 and Windows 10.
Method 3 – Bad Driver
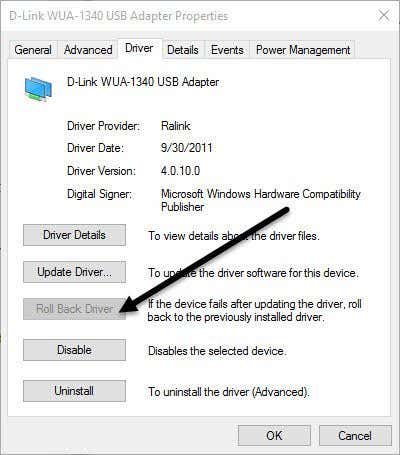
If you recently updated a driver for a piece of hardware on your computer, it could be a faulty driver causing the blue screen issue. Drivers are essential for Windows, but sometimes the latest drivers can cause more problems than they fix. If you are using third-party to automatically update your PC drivers, it’s probably a good idea to configure the software so that you can review each driver that is going to be updated beforehand. Anyway, you can try to fix this problem by clicking on Start and typing in Device Manager. Right-click on the device that you updated the driver for and select Roll Back Driver. You can also choose Properties and then go to the Driver tab and click the Roll Back Driver button.
If the button is disabled or you don’t see the option when you right-click on a device, that means the current driver is the only driver ever installed for that device. One last thing you can try is to click the Uninstall button and restart your computer. Windows will automatically try to install the driver for the hardware when Windows reboots. If this didn’t work, try the next method.
Method 4 – Last Known Config
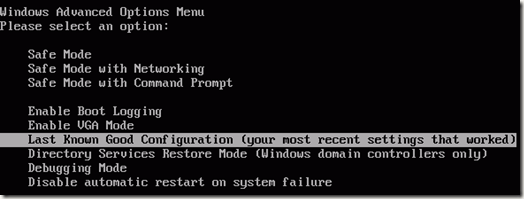
In some cases, the issue is bigger than just a driver and will require using the Last Known Good Configuration feature in Windows.
This basically brings back an older version of the entire Windows registry that worked. In Windows 7 and earlier, you just have to press the F8 key in order to bring up the Advanced Options screen when booting up. In Windows 8 and Windows 10, check out my post on how to load the System Recovery Options screen since the F8 key no longer works on those two operating systems. In addition to trying Last Known, you should also try to do a System Restore if Last Known didn’t work. Check out my previous post on how to perform a system restore.
Method 5- Check RAM
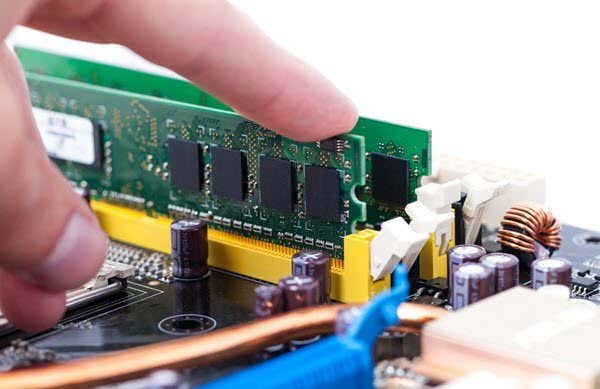
As mentioned above, RAM is usually the main culprit when it comes to this error. Usually, it means the RAM has become defective. Most computers will have multiple RAM chips installed and you can sometimes fix the problem by just removing the bad chip and leaving the rest in.
Before you do that, though, read my post on how to check for bad memory on your PC. If you think there is a problem with the memory, visit your computer manufacturer’s website and download the manual for upgrading RAM on your computer. The guide will usually tell you how to open the computer and where to look for the RAM. If you have more than one RAM chip, pop one out and then turn on your computer. If the blue screen goes away, then you took out the bad one. If not, switch and try again. If you only have one RAM chip, then you need to purchase another RAM chip as you can’t run the computer without at least one RAM chip.
Method 6 – Anti-virus Software
In some rare cases, your anti-virus software can be causing the blue screen errors. I recommend uninstalling your anti-virus program completely and then restarting the computer. The chances are quite small that any software will cause this error, but it’s worth a shot at this point, especially if you are using an anti-virus product from a smaller lesser-known company.
Conclusion
If none of these methods fixed your problem, you could have a more serious issue with your computer. At this point, it’s probably a good idea to take your machine to a professional to check other hardware like the motherboard, CPU, etc. If you have any questions, feel free to comment. Enjoy!
