Microsoft admitted the error was more prevalent in Windows 7 and server 2008 R2. A service pack to fix the error was also provided. But, now, since Microsoft no longer provides support for Windows 7, upgrading is recommended. However, if you’re receiving this error in a higher version of Windows, read the article to learn about the main causes and solutions.
What Causes Error 0x0000006B?
How to Fix Error 0x0000006B?
Let’s begin by detaching all the peripherals, especially those connected using SATA ports. As a storage device, let only the boot device be connected. Perform a power cycle by disconnecting it from the power source and holding the power button for more than 15 seconds. It will ensure that no driver’s temporary initialization bug or lock loop affects the booting process.
Missing or corrupt system filesFaulty or absent driversBad sector or damaged driveUnnecessary peripherals
Then, try the solutions mentioned below:
Use Windows Recovery Environment
Turn off your computer by holding the power button for a while. Then, restart it. Before the error screen loads, hold the button to shut your PC and repeat this process thrice. On the third boot, your PC should enter Windows Recovery Environment. If Windows RE isn’t loading, move on to use Windows Recovery Media. Else, you can proceed with the mentioned fixes:
Run SFC, CHKDSK, and DISM Commands
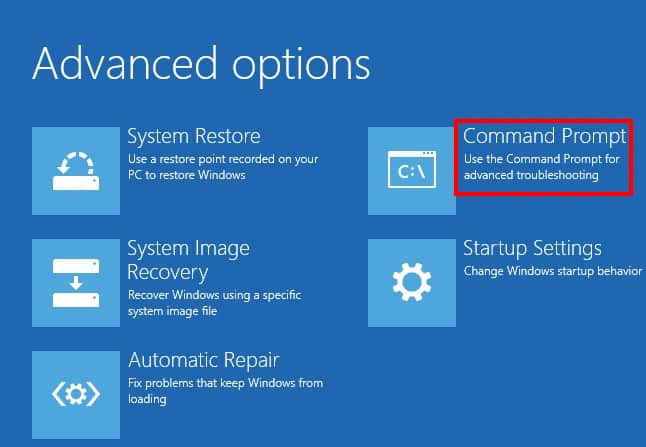
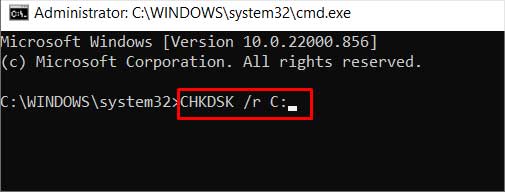
Error in the system files and disk can be fixed by running commands like sfc /scannow in the command prompt of Windows RE. Then follow the steps given below to open the command prompt: First, check which partition of your disk has system or boot files. To check, run the command bcdedit. It lists a bunch of information in which the Windows Boot Loader section consists of the device where boot files are placed. Let’s say you have partitioned C: as the boot drive, then continue with the given commands: Then, close the command prompt and choose to Continue in the Choose an option screen.
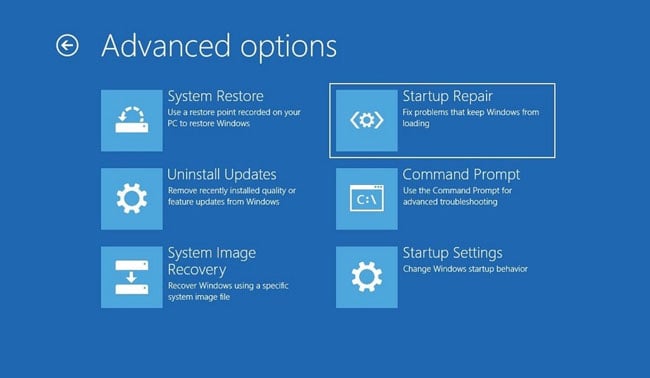
Startup Repair
Here’re the steps to perform the startup repair: The following screen will either indicate success in repairing Windows or will show that the system can’t be repaired.
File Replacement in Safe Mode
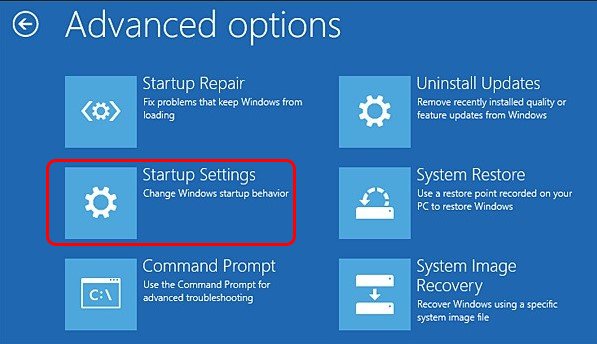
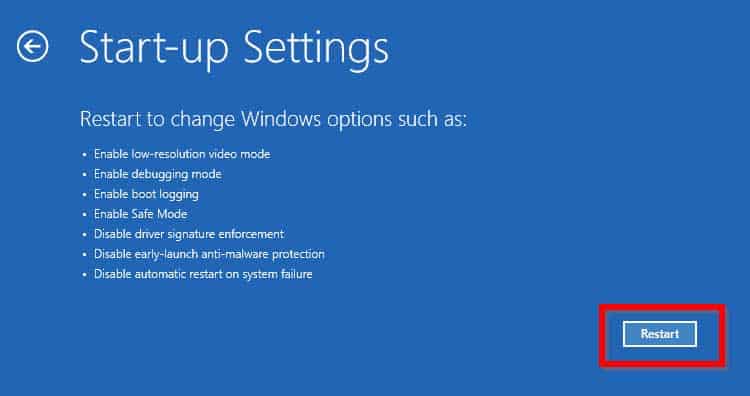
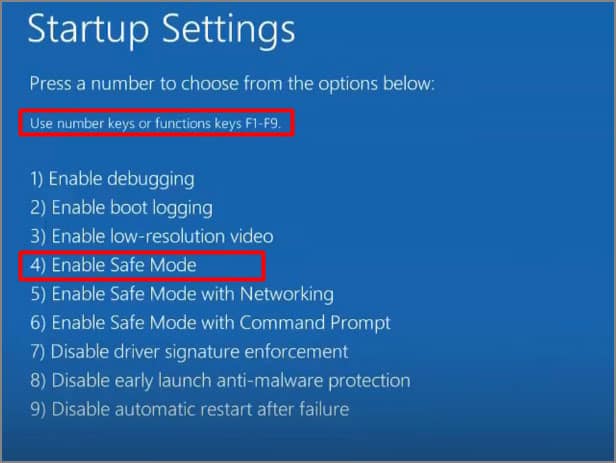
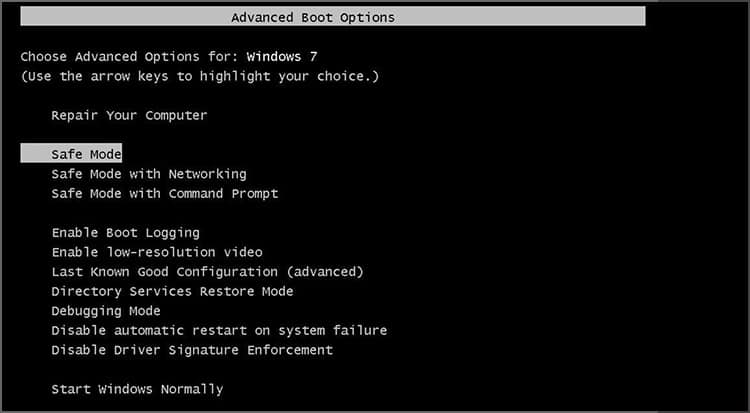
Ntdll.dll is a system file that handles various kernel to OS-related operations in Windows. It is very crucial for Windows to function or even boot properly. Issues in the file can result in the discussed BSOD error. So, you will have to resolve any problem in that file of your PC by replacing it with a healthy dll file. To replace the file, you must enter the safe mode first, which can be done through the Windows RE. Unlike normal system load-up, safe mode won’t load all the drivers and will utilize a minimum amount of files making it convenient to replace the corrupt dll file within your system. Follow the steps below to load safe mode: Once the screen loads, you will enter safe mode. Now, you will be able to delete the already existing ntdll.dll file on the location: C:\Windows\System32 with a new one. It would be better if you could copy the same file from another soundly working computer. But if you can’t catch up with it, you can download the ntdll.dll file from the internet. Download and extract the zip file. Copy the .dll file from the extracted folder. Then remove the existing one and paste the new file onto the location. Then, exit safe mode and restart your computer to check if it solves the issue.
Use Windows Recovery Media
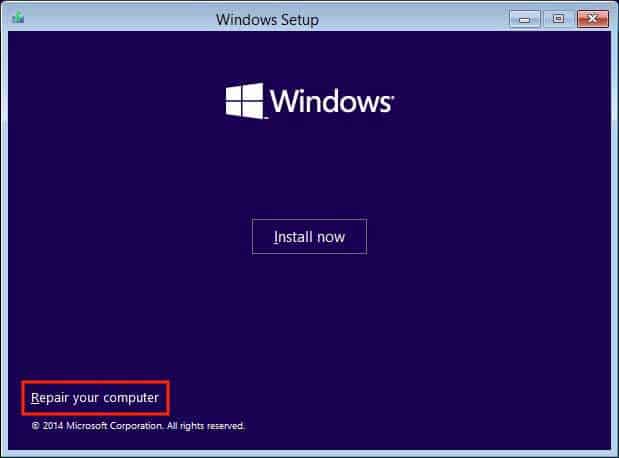
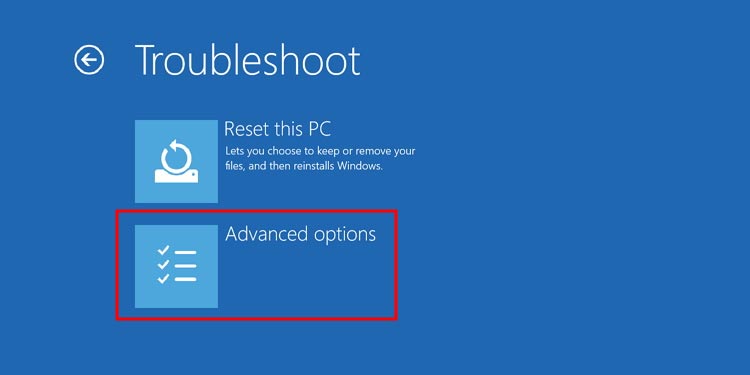
If you enter BSOD error, chances are Windows Recovery Environment would not load up. In such a case, you may need to use Windows Installation Media to execute the above commands and steps. Download the Windows Installation Media to a bootable device on any other computer and plug it into the one showing this error. Then, proceed with the given steps to enter : Once you reach the Advanced options menu, you will have further options for the recovery environment except for safe boot. Perform all the fixes mentioned in the above section, and proceed to the next part to enter safe mode. You can boot to the safe mode by following the steps mentioned below: To change the dll file, you can insert the external drive with the ntdll.dll file in it when you are in the safe mode. Go to the file location as mentioned in the previous section and replace the existing ntdll.dll file with the one on your drive.
Delete Bootcat.cache
The fix mentioned here is for only devices with Windows 7 and server 2008. As I have already mentioned, support for these operating systems has ended officially. So, it is better to upgrade to higher versions. But, in case you don’t want to upgrade right away, there’s a quick fix to troubleshoot this BSOD error temporarily. Bootcat.cache file located in the system, if changed, misplaced, or corrupted, is certain to cause this error. So, you can try to delete the file from your system by entering safe mode. Follow the steps below to load safe mode: Once you enter safe mode, navigate to C:\Windows\System32\CodeIntegrity and delete Bootcat.cache file.
Reset or Reinstall Windows
You could also use WinDbg to determine the BSOD’s root cause. WinDbg will return specific error values, which will make it easier to find particular fixes. But, If nothing is fixing your issue, it is recommended that you reset or reinstall your OS.

