Indeed, ASUS motherboards are quite popular as they’re affordable and have better onboard features, heat sinks, and thermal designs. Generally, getting into its BIOS is almost similar to any other motherboard. Nonetheless, the dedicated keys and the configuration options can differ for different manufacturers. So, if you recently switched to an ASUS motherboard and have no idea about its configuration, you’re at the right place. Here, you will learn the different methods to get into its BIOS and the available settings you can tweak.
Are BIOS and UEFI the Same?
If you’ve ever tried getting into BIOS, you may have encountered the term ‘UEFI’. And you might have wondered if they are the same. Although BIOS and UEFI both help a PC to boot, they are slightly different. While BIOS can only handle partitions less than 2 TB, UEFI supports much larger storage. This is because UEFI uses GPT to keep data organized, while BIOS uses MBR for boot sector partitioning. To learn more about this, we have dedicated a post that discusses the differences between MBR and GPT. Moreover, UEFI is comparatively quicker and also uses an attractive graphical interface, which a BIOS lacks. Thus, a few motherboards have stopped adapting the Legacy BIOS mode and have started including just the UEFI Firmware Settings.
How Can I Get Into BIOS on an Asus Motherboard?
You’ve probably planned to tweak your RAM, fan, or hard drive settings on an Asus motherboard. In this section, we’ve included the two easy steps to getting into UEFI/BIOS boot mode.
Using Dedicated Keys
Most Asus motherboards use Del or F2 to enter BIOS. While some models include both BIOS and UEFI, few modern motherboards only support a UEFI setup. Here’s a complete guide on how to get into Asus BIOS the right way:
From Windows Recovery Environment
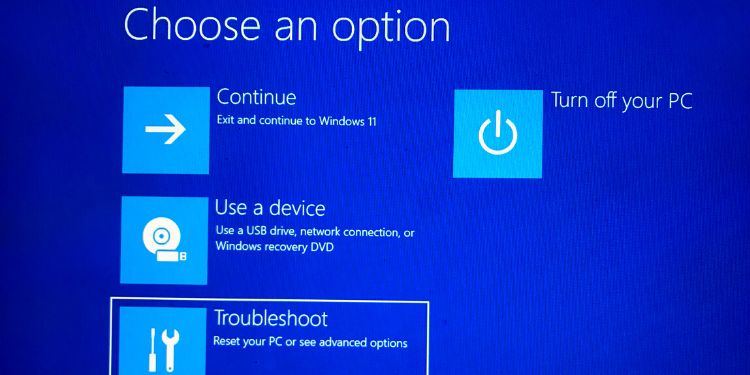
Windows has a recovery environment where you can check and repair system errors causing issues while booting. Along with several other options, the WinRE allows you to enter the UEFI Firmware Settings. In the earlier method, you needed to power off your device. So, if you want to enter your Asus BIOS without shutting down your PC, Windows Recovery Environment is the best option. So, without further delay, let’s jump into the different ways to open the WinRE or Advanced Settings screen. Then, we’ll explore how to enter the UEFI/BIOS mode on Windows 11 easily.
Launch Windows Recovery Environment
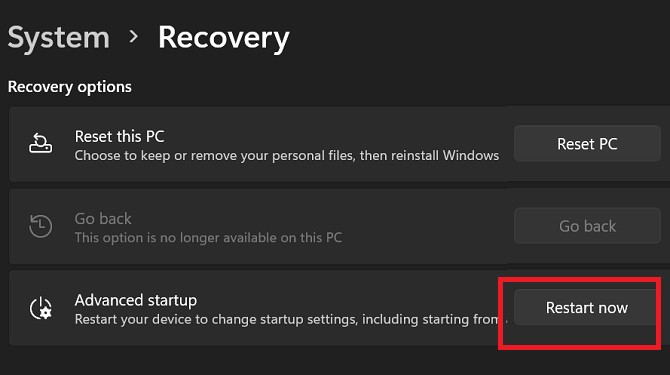
Well, the easiest method to enter Windows Recovery Environment is by pressing the Windows icon on your taskbar. Then tap the power icon. Now, hold the Shift key and click on Restart. Finally, wait until the blue screen appears. Nonetheless, you can also do the same thing through Windows 11 Settings: Moreover, this is also possible using bootable media. However, you need to shut down the PC and boot again. Once the installation screen appears, click on Repair your computer, which will take you to the recovery window. Lastly, you can also launch the WinRE using the Run Dialogue Box or the Windows Terminal. All you need to do is open one of the applications and run the following command line:shutdown /r /o /f /t 00
Launch UEFI Firmware Settings
Once the Windows Recovery Environment is launched, follow the below steps to open UEFI/BIOS mode:
Different Settings on Asus BIOS
If you have an Asus motherboard, there are plenty of settings you can explore from its BIOS. So, whether you need to fix certain bugs or try out certain settings, you can do so easily from this mode. Given below are all the tabs where you can tweak and customize major settings for your computer:
Can’t Get Into Asus BIOS – Here’s What You Can Do
Getting into the BIOS mode can be tricky. If you do not press the correct dedicated key, your Asus motherboard will boot Windows instead. Whatever motherboard you choose, using Delete or F2 generally opens the BIOS, but there may be a few exceptions. So, we suggest looking up the user manual or refer to the internet to know the right key. If you’ve tried several times and still can’t enter the UEFI/BIOS mode, use the following fixes to solve your problem.
Check Whether the Keys are Working
The first thing to check is whether the Delete and F2 keys are working fine. Sometimes, debris may be stuck inside these keys, preventing you from pressing them correctly. Moreover, there can be switch or rubber nob issues too. So, we recommend taking it off and reattaching the key. If this doesn’t work, you can use another keyboard and try pressing the keys again to get into BIOS.
Try a PS/2 Keyboard
If your Asus motherboard has Legacy USB Support disabled, your USB keyboard may not take you to the BIOS using the dedicated keys from the startup screen. So, we recommend using a PS/2 keyboard, if possible. If this resolves your issue, make sure you enable the option. To do so, you’ll need to access the CMOS Setup Utility and enable the USB Keyboard Function from the Integrated Peripherals option.
Turn off Fast Startup
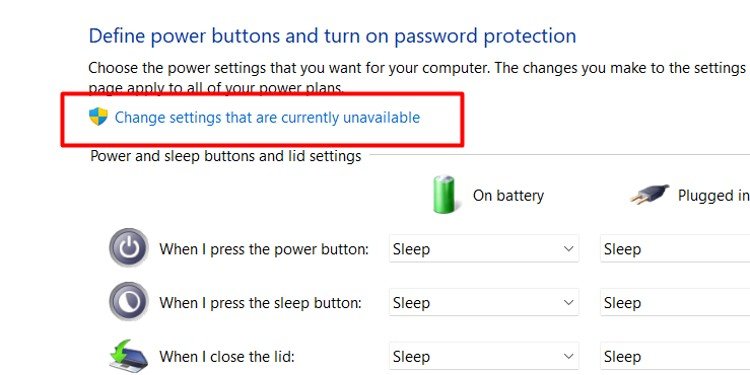
If the Fast Startup is enabled on Windows 11, your computer never shuts down. So, your system starts before you even hit the dedicated key. So, ensure that this option is disabled:
Reset BIOS
Resetting BIOS will factory reset everything and take it back to default. This way, any issues with your motherboard will also be fixed. Also, if you have forgotten your BIOS password, this method will solve your problem. To reset BIOS when you’re unable to get into it, you’ll have to reinsert the CMOS battery or reset using the jumper.


