Most of the games made for Nintendo Switch comparatively occupy a larger memory space. Obviously, the in-built memory won’t be sufficient. So, you may want to insert an SD card or remove it to swap with a higher-capacity card. Or, you may want to transfer contents from your old SD card to a new one. In this article, We will guide you through the steps to install or remove a micro SD card in Switch.
How to Install a Micro SD Card in Switch?
Once you purchase a micro SD card to expand the storage capacity of your Switch, you need to install it properly. Installing the SD card into your Switch is not that tedious and time-consuming. You will get it done right if you follow these steps:
How to Remove a Micro SD Card From Switch?
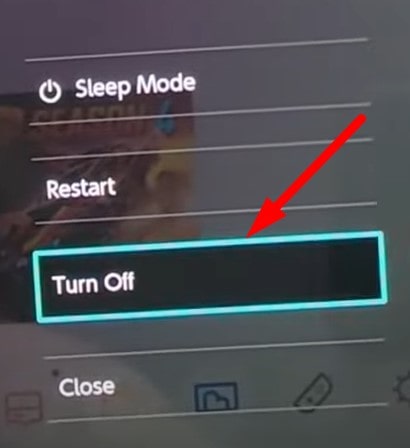
With time, the SD card will get full, and you may consider getting a new one with higher capacity. Or, you may want to transfer the contents to another one. In such a case, you need to remove the SD card. Here’s how to do it:
How to Manage Space on Your Switch SD Card?
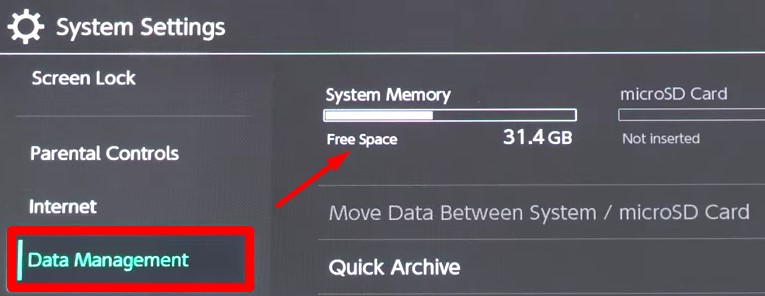
You might be curious if you can install more games on your Switch. But if you are running out of storage or have less space remaining, you can’t install the games, or your gaming performance will degrade. You may experience some lags in the games when your SD card is getting full. You can easily check the remaining storage on your Switch and act accordingly. You can either delete the games you don’t play anymore or format the entire SD card to fresh install new games. Or, if you have a new SD card with higher storage capacity, you can transfer all of its contents from the old SD card to the new one.
Check the Remaining Storage on Your Switch
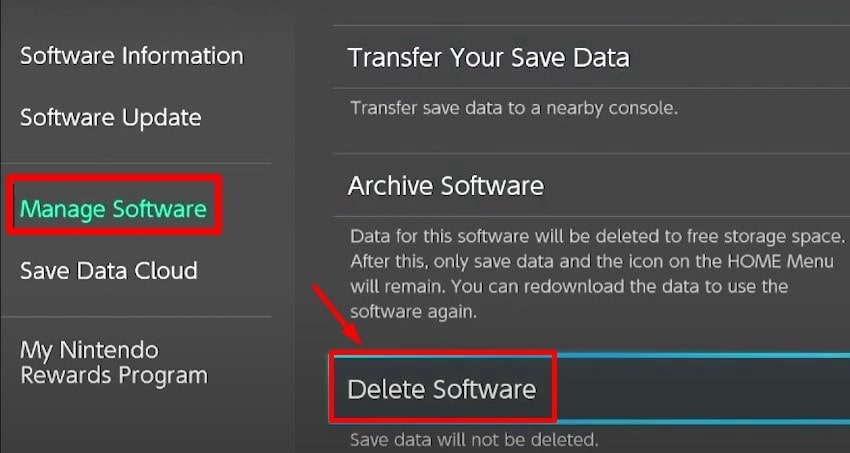
Delete the Games That You Don’t Play
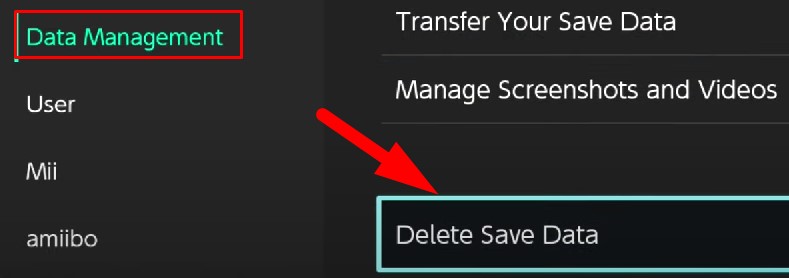
When you delete a game, it won’t delete the saved data. You can again install it and continue playing. If you want to delete the game completely, follow these steps:
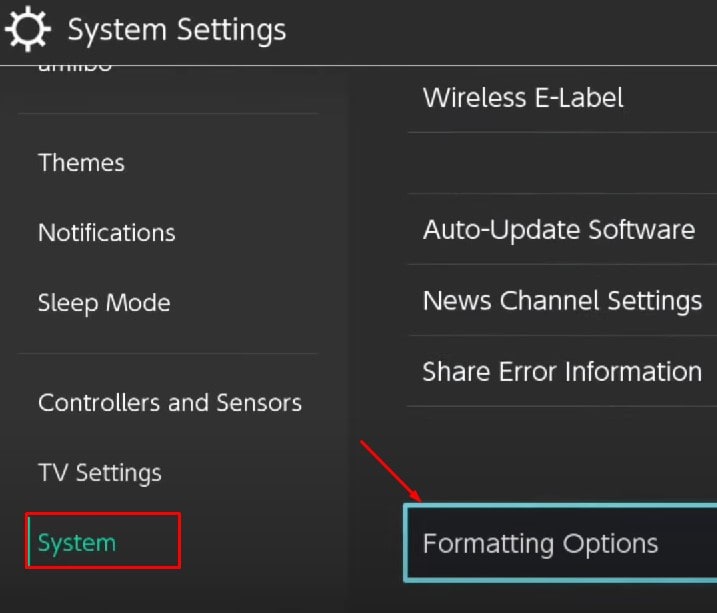
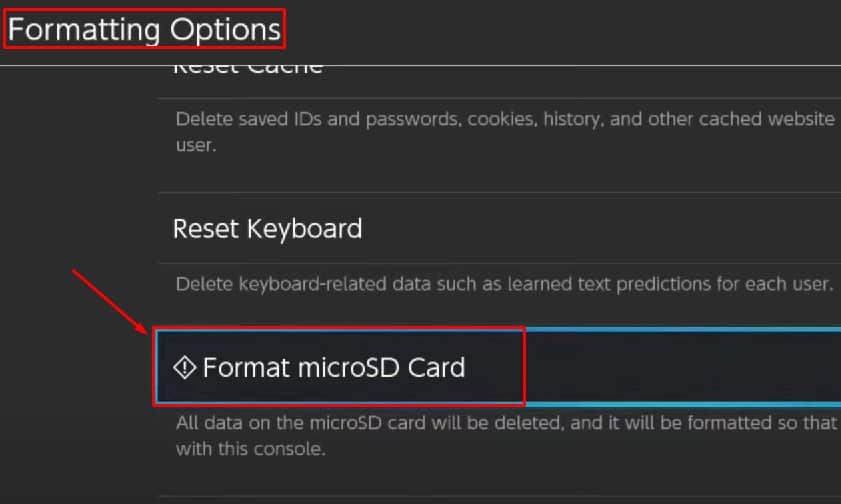
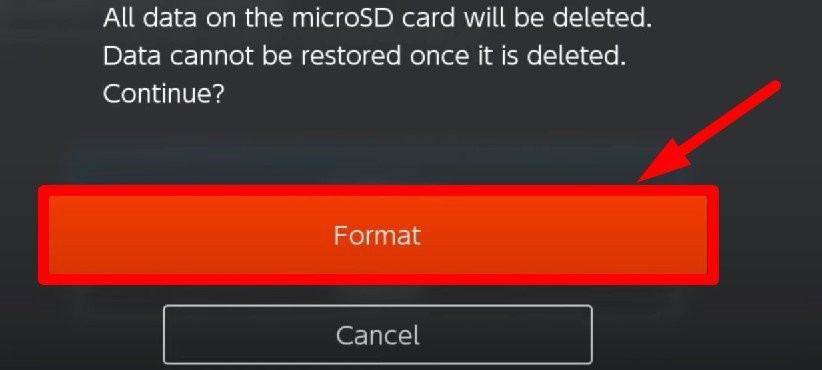
Format the Micro SD Card
Here’re the steps to format your micro SD card:
Transfer Contents From Old SD Card to the New One
