But, this could not be the reason why your Scanner is not working. There could be incompatible Operating System, system failure and much more. Regardless of the many reasons, this article gives you a detailed guide on fixing this issue. So, without further delay, let us get right into it.
Why Is My Scanner Not Working?
Once a scanner is connected to the PC, the scanned document will show up in your system. The only reason scanner fails to do so is if some Windows service fails to start. Besides this, physical connection issues may also stop the scanner from being detected.
Is My Scanner Connected to the PC?
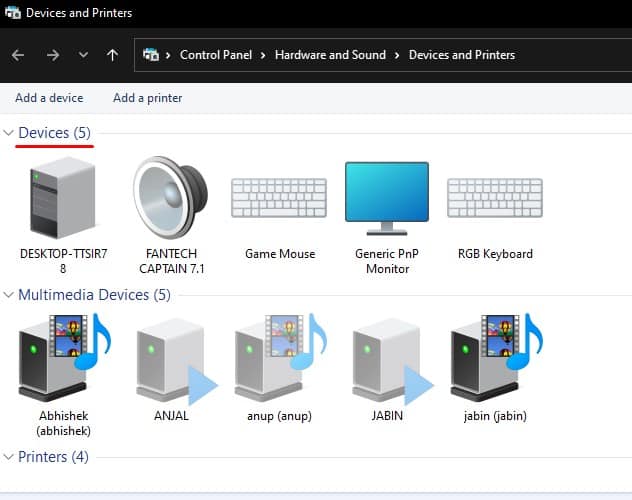
Before starting, make sure that the scanner is connected properly to the PC. To check if the scanner is connected to the PC, If the PC is not detecting the scanner, you might need to check for wired/wireless connection issues.
How to Fix a Scanner That Is Not Working?
Once you have checked whether the device is connected to the PC, you need to perform solutions according to the problem you face. Below we have provided solutions for both scenarios: hardware not connected and when the hardware is connected but not working.
Setup Connection for Wireless Scanners
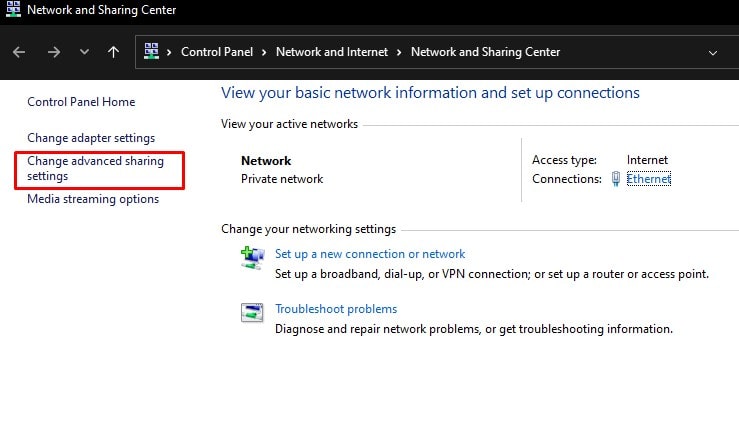
A wireless scanner uses Wi-Fi connectivity to connect with a system. You should connect both the scanner and the PC to the same network, configure firewall, enable network discovery and use private network to send data over a wireless connection. First, make sure that the Network Profile type is set to private. You can configure this through Network and Internet Settings. Once you do this, enable network discovery.
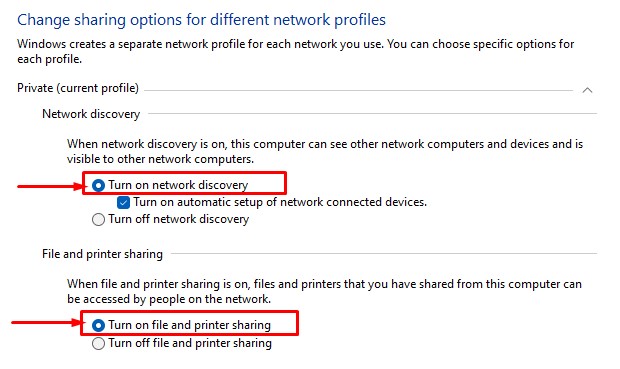
Enable Network Discovery and File and Printer Sharing
The computer will be hidden to other devices over a network if Network Discovery is turned off. Enabling network discovery can not only make a device visible on a network, you can also access the device if you have the right credentials. For you to access a scanner over a network, you must enable Network Discovery. To turn on Network Discovery,
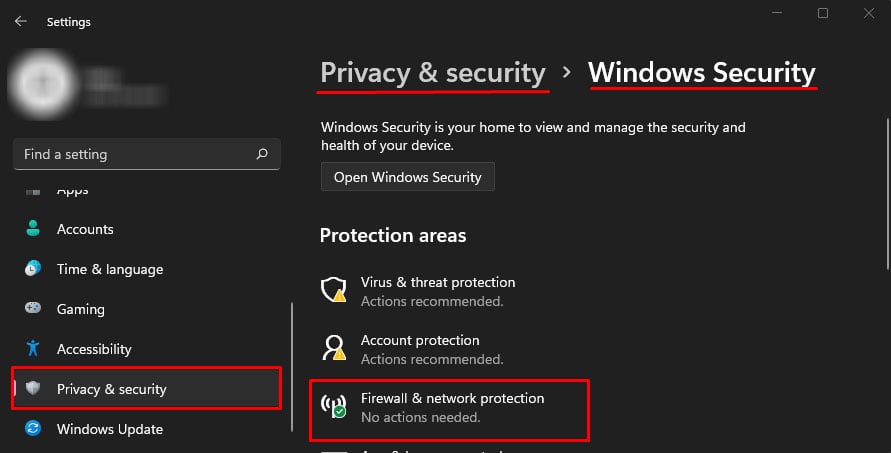
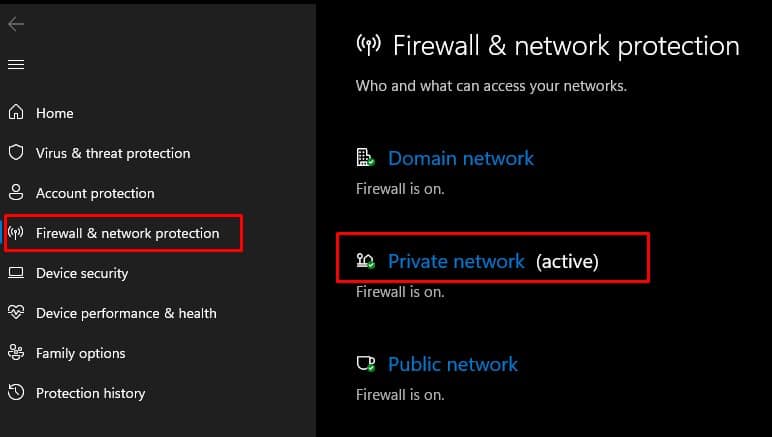
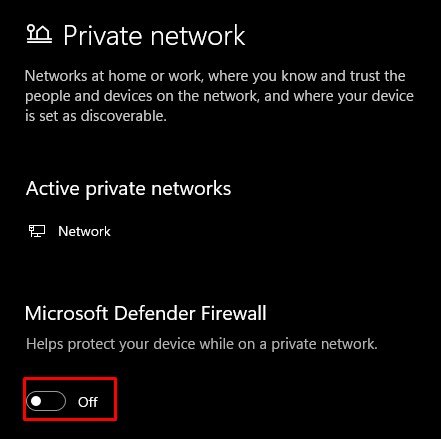
Disable Firewall
Once you turn on Network Discovery, firewall is responsible for checking all data that enters or exits your PC. It also blocks any malicious or suspicious connections. Try disabling your firewall and check if the scanner works. Scanners may also face issues if two systems try to use the same device over a network. Make sure that only one PC is connected to the scanner. If your PC connects to the scanner, but the device does not print, you can try using a wired connection to connect to the scanner. When using a wired connection, only the connected PC has access to the scanner/printer.
Restart Related Service
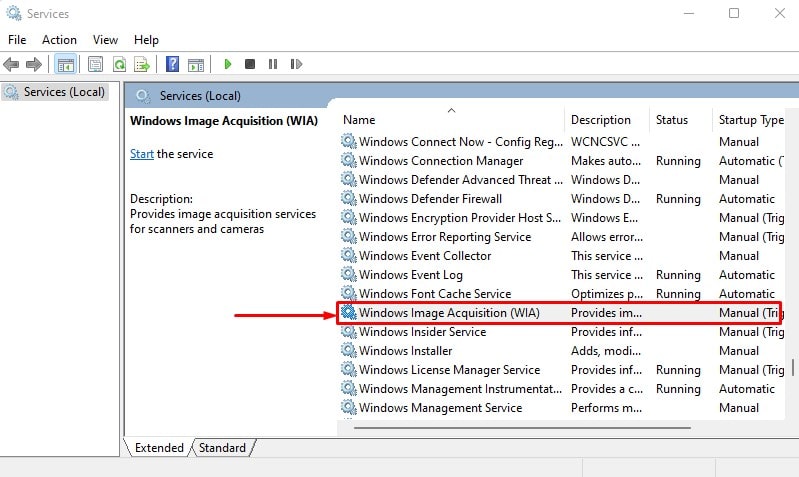
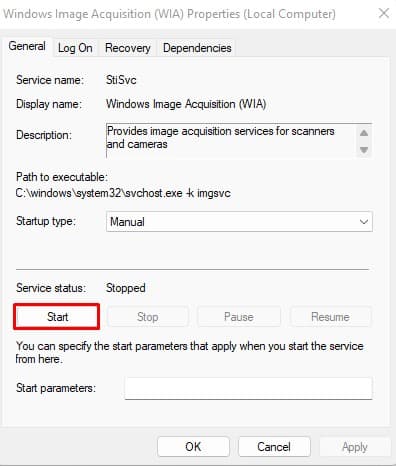
Once the PC detects the scanner, it means that it has linked with the device and is ready to use. However, one particular service named Windows Image Acquisition service needs to be running for a PC to access the image sent from the scanner. Follow the steps mentioned below to enable Windows Image Acquisition. You can also find other services that may be responsible if the PC and the scanner do not connect. In this case, you need to restart the services mentioned below by following the same steps.
Remote Procedure Call (RPC)DCOM server process launcherRPC endpoint mapperShell hardware detection
Install Brand Specific Driver
Depending on the manufacturer, the scanner may have a dedicated driver that you need to install to make the device compatible with your system’s OS. We recommend you to go through the scanner’s user manual to properly set it up. If the scanner is not a PnP device, you might need to access the manufacturer’s website to download the correct driver. Once you have downloaded the correct driver, simply install the driver to use the scanner.
Run Printer And Hardware Troubleshooter
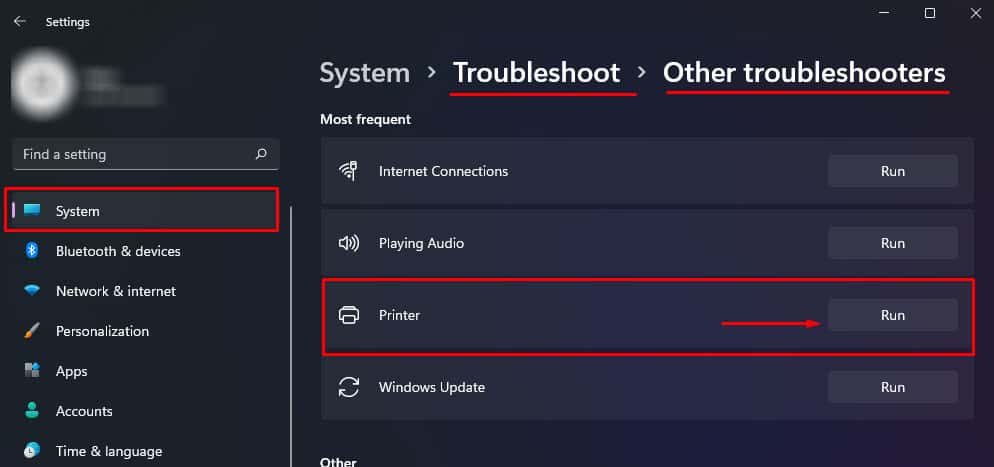
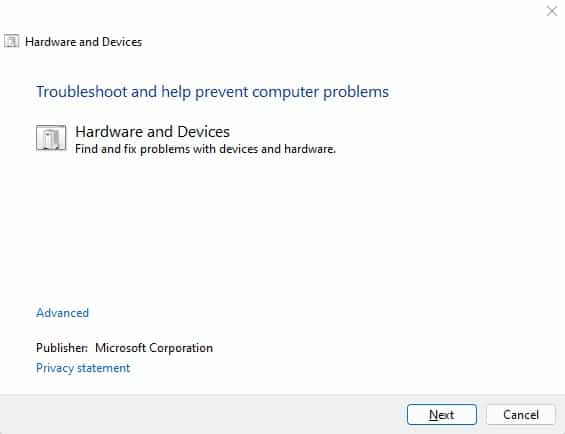
The troubleshooter utility in Windows scans the selected device for issues and performs necessary measures to find a solution to fix the problem. Likewise, the printer troubleshooter scans the printer or the scanner, whichever is connected, for problems. Once it finds the issue, it will prompt to adjust the necessary device settings to fix the scanner. You can also use the printer troubleshooter to fix any issues with the scanner. To run the printer troubleshooter, Wait for the troubleshooter to detect the problem. The OS will automatically adjust the necessary settings to fix the Scanner. Since it is a hardware issue, you can run the hardware troubleshooter to check the system for any device-related complication that may be stopping the scanner from functioning.
Turn off Default Printer
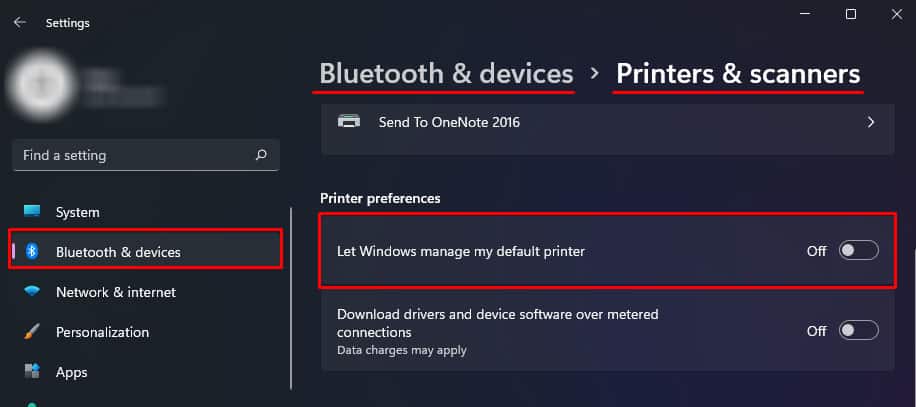
The PC will automatically connect to a printer/scanner if you have previously set a default printer. If the PC is connected to two devices constituting printer and scanner, you may face problems while scanning from the secondary one. The above situation is only applicable if both the devices consists of printer and a scanner. To remove the default printer, follow the steps mentioned below.
Check Wires and Ports
One disadvantage to using a wired connection is physical damage to the wires. The same applies to a wired connection to connect the scanner to the PC. Check for physical damages to the power cable and the cable connecting the scanner with the system. Besides, you can also check if the port has any visible damages. If the ports are damaged, you will need to repair them. We recommend you contact the manufacturer support page or local electronic repair shop to fix the issue.
Update Scanner Driver
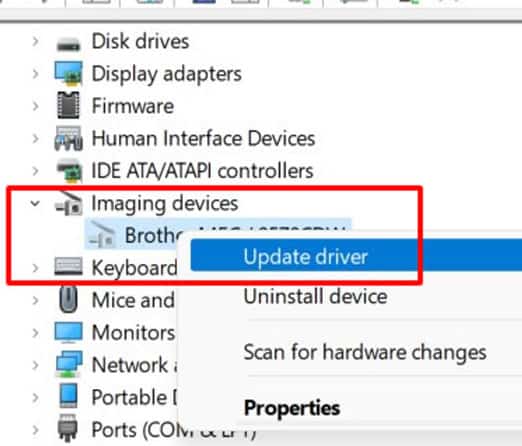
Once you connect the scanner to the PC, the operating system will automatically install its necessary drivers. An outdated or corrupted driver will cause complications when the device tries communicating with the OS. Update your scanner drivers to get the latest version of the driver.
